Wednesday 11 December 2013

Colour


I found these images while looking into creative ideas in the studio, they have been taken by using coloured gels and this is something that I would love to try in the studio sometime in the future (probably not this project as I would have to rush to get the gels and learn how to use them fast, I would prefer to be able to take more time learning with them and experimenting with different outcomes)


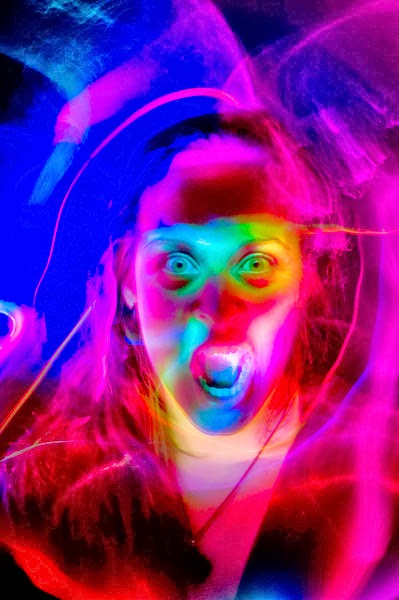
Julian Cash


These images have been taken in the studio using torches and light painting, I would like to try creating something similar by using coloured gels on the lights and torches. (I have done light painting before but only using one torch and colour so it would be fun to use more than colour at a time.)

http://www.juliancash.com/view/jc_edible/set/large_foo_1503.html
http://www.juliancash.com/view/jc_edible/set/large_foo_1606.html

http://www.juliancash.com/view/jc_edible/set/large_foo_1479.html


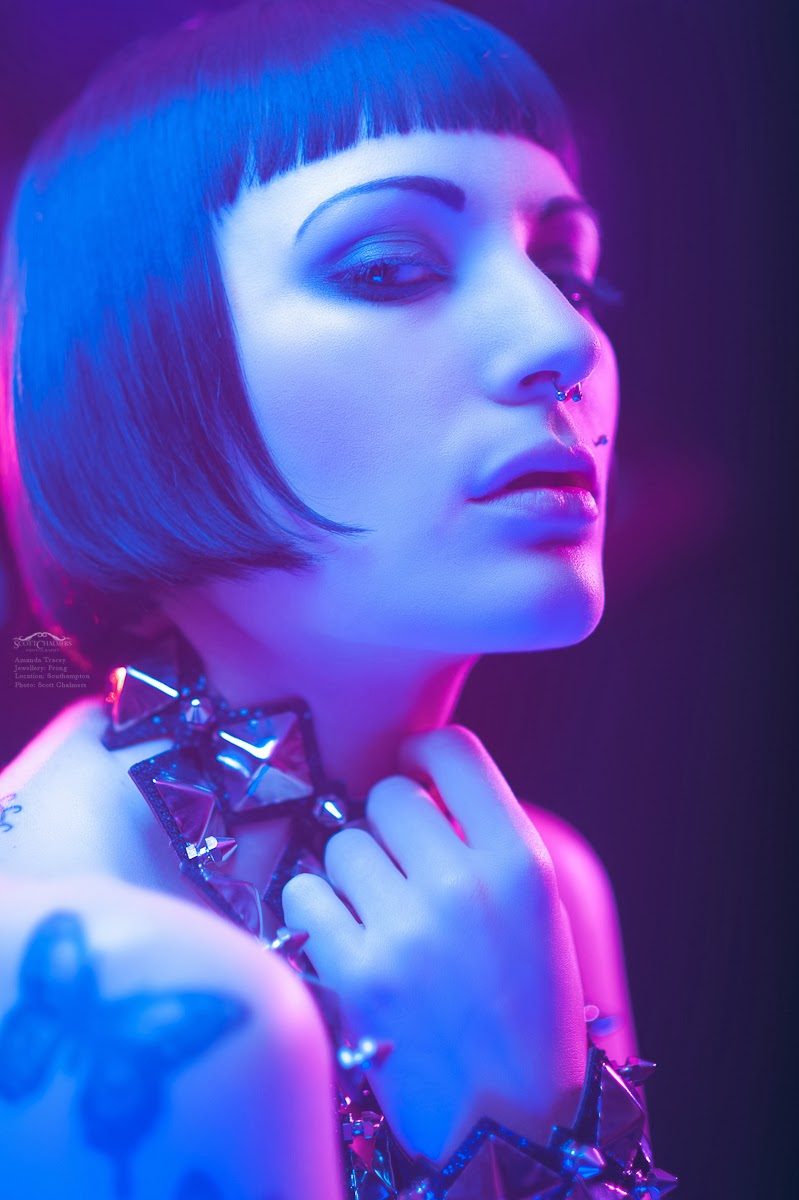
Scott Chalmers

These have been taken using coloured gels over the top of the lights in the studio, using coloured gels is easier and faster than spending time retouching in Photoshop to get the same effect. Plus while shooting if the lighting does not look exactly right for each individual pose the model is doing it can be easily changed whereas on Photoshop it would take hours to adjust each image separately.


Neil van Niekerk


The coloured gels don't always have to be used on the model, they can also be used to add some colour into the background like in these images:


I like the way the background adds a dramatic effect and looks to me as though an orange coloured backdrop has been used instead of using a gel. This is easier than buying different coloured backgrounds and having to re-set up the backdrop for each shoot or even during shoots.


DIY


I had not heard of using coloured gels over the lights so this is something that interests me, so that I could practise easier and quicker than with buying gels (because I have no idea which are good and which aren't) I looked into how to create home made coloured gels, on a website called Digital Camera World I found an idea that I am going to try... cutting up plastic wallets, only I am going to use the coloured section dividers in an old notebook.

DIY Photography Hacks : macro studio

Wednesday 4 December 2013

Studio Artists


Denis Firman


I love the use of shadows within the photographs as it puts the model into a location instead of being just on a white background as sometimes the model looks a little lost within the photograph as there is only negative space around them.


Steve Kraitt

http://www.kraitt.com/#a=0&at=0&mi=2&pt=1&pi=10000&s=0&p=0


http://www.kraitt.com/#a=0&at=0&mi=2&pt=1&pi=10000&s=0&p=0

I think the effect created within these photographs are unusual and different and I would love to try creating my own similar photographing using light painting.


Lutz Mahnhardt


http://www.mahnhardt.de/people/studio/studio.html


http://www.mahnhardt.de/people/studio/studio.html
These studio portraits are quite simple in their composition and I would like to create similar style photographs, showing the personality of the models.


Dan Newton


http://www.liquidinplastic.com/2011/02/val-in-the-snow/

For the theme of this project I would also like to focus on people with hats, gloves and scarves on to cover themselves from the cold, I think this will help keep the model relaxed if they are not used to being infront of a camera as they will feel better having some shelter from the camera. It also means that plenty of models will be available as people will be wrapping up warm now it is winter.


Studio Time


For this terms project we are getting introduced the equipment in the Uni's studio rooms, then being split into two groups within our class and working together to create portraits of each other using a Hasselblad camera with a Phase One digital back rather than shooting film.

We will be sending photographs to be professionally printed at the end of the project so I cant wait to see how those are going to turn out.

After getting shown into to the studio we went through how to safely set up lights and health and safety measures in the studio :
  • tape down wires, so nobody trips over
  • set up the light so the flash is facing a leg, this means it is sturdier
  • no food or drinks in the studio, incase of spillages
  • take the cap off the light before switching it on, the cap will melt within 10 secs
  • wait for the lights to cool down before replacing lights cap, same as above
  • turn to the lowest flash power and discharge all energy before turning off
  • do not leave flashlights without some sort of cover or attachment on them, if people knock them there is less chance of the bulb breaking
  • wrap the power cable around the bottom of the tripod, if the wire is pulled it will pull the tripod not the light
  • when changing the light fittings ensure they are properly dis/connected 
  • ensure the electrical equipment is PAT tested 
There are also some general tips to working with models in the studio as well :

  • use model release forms
  • inform them of exits and fire drills
  • be careful of what might hurt the model, certain poses may only be achieved for a certain amount of time and costumes may be heavy, help the model anyway possible


We have been shown different lighting style set ups such as frontal, glamour, rembrandt and slight side and asked to create them ourselves, I took photographs using each set up however between shooting and transferring them over to my student account I have lost the Capture One session details so I am unable to open them.

Paintings

To start my research I am going to look at painting because photography is an evolution of paintings and many of the lighting setups we use now had been used in paintings beforehand. Painters would typically use windows at the side of their models to generate the light, such as in Jan van Eycks " The Arnolfini Portrait " this is why we now use the flash light at the side of model to recreate this effect.

Jan Van Eyck - " The Arnolfini Portrait "

Van Gogh also used side lighting in his work, although this could be from many different light sources as most of his work is close ups of the models, I can see the line down the side of the nose where the shadows start.

Head of a woman with her hair loose


Another style of lighting developed from paintings is the slight side lighting seen in Vermeer's " Girl with the pearl earring " and Leonardo Da Vinci's " Mona Lisa "

 
Mona Lisa
Girl with the pearl earring


Now the hardest part is deciding on a theme for my photographs, hmmmm....