Saturday, 31 January 2015
The Studio Photographers Bible
The Studio Photographers Lighting Bible
Author : calvey Taylor-haw
Switzerland: RotoVision SA, 2007
"Avoid strong shadows with subtle use of fill-in lighting. Make sure the food looks very fresh, not dry and wilted. Keeping the studio and lights cool will help"
Page 68
Blu-tack is handy
"Customers like to see a product before they buy, and its the job of the photographer to show the product in the best light"
page 71
"The vital first step - make sure you understand exactly what is required"
Page 94
"Still life is studio photography in its purest form"
Page 97
get creative - no limitations in creativity
What about lighting food from underneath?
Props !!!
Use dulling spray or polarizing filter to rid unwanted glass reflections
start with backlighting glass, or shooting from a reflector, black reflector adds definition
put products underwater or in unusual locations
location shooting
Bubbles : dark background, light from above, white reflectors either side
place objects on mirrors
movement ? Slow shutter and flash, or step by step photos
Sweets


Friday, 30 January 2015
Food Ideas List
- pomegranates
- pineapples
- leeks / spring onions
- ginger
- strawberries
- pasta
- tomatoes
For the food section I want to focus on the individual foods rather than creating a meal, there is still a need for photographs of individual foods and I think there is more potential for me to develop these images further than creating a meal, plus as I am working in the studio for most of this workshop it would be difficult to make and prepare a meal either in the studio (with only a small microwave) or bringing one through to uni on a two hour bus ride (it would be a ruined mess by the way some drivers are). So I want to be able to create a photograph showing off the individual items of food, for example different fruits such as in the list above.
Some examples of photographers work that I found and that interested me:
http://isbdigitalphotographyyoon-jinlee.blogspot.co.uk/
http://ibakeheshoots.com/tutorial-high-key-food-photography/
 |
| Image from "I Bake He Shoots" |
This link is some tips about different styling and composition tips, I think it is good to read these before shooting myself so that I can be prepared with more of what to expect and not have to make these mistakes myself, however I know I will still make some mistakes.
http://ibakeheshoots.com/impress-friends-splash-photography/
 |
| Image from "I Bake He Shoots" |
Printing Colour
Looking Around The Darkroom:

What I Think Of The Darkroom
The first time I went in I thought I was going to really struggle with using this darkroom as I could barely manage to find the booth that I was sharing with my friend, so she helped guide me around the room and setting the paper up for contact sheeting was confusing me as I did not always get it straight in line. But the next time we went in we got more of it right and I started to become more comfortable with printing contact sheets, so I went and collected some more equipment from the technicians and set up my own enlarger so that I could print on my own. I really enjoyed the printing and I got into it once I was comfortable with the room and the process, I surprised myself at how easy it was now compared to the first time printing once I stopped and realised what I was doing.
Issues
First getting shown around the darkroom the first thing to note was that it was a lot smaller than the black and white darkroom, this meant there is less available machines so getting time to use the machines could have been a problem, this was resolved by the fact the photography store did not have enough paper boxes to give everybody a box so the people who did manage to get paper were able to print before there was a mad rush to the machines, another factor that helped calm the mad rush was the timing of a week long trip that meant some of the course was abroad so there was less people wanting equipment out.
Using The Machines

This is one of the machines that is in the colour darkroom, this particular machine is outside in the print viewing room and is not set up but it shows the machine.
Inside the darkroom is both LPL machines and Devere machines, I have been using the LPL machines as I have mapped out the room to and from the side they are on.
Filters

Inside the darkroom is both LPL machines and Devere machines, I have been using the LPL machines as I have mapped out the room to and from the side they are on.
Filters

When starting printing make sure the filters are first of all switched on and then set them to 0 Cyan, 50 Magenta and 50 Yellow.
After looking at your print then decide if there is a colour cast on them and change the filters accordingly.
Food Artists
For this food workshop I am going to be taking photographs of strawberries, I have looked online to find artists that photograph fruit in order to help influence my work. I have chosen strawberries as I did not want to photograph a full meal as I feel that creating a meal within the studio is probably more of a recipe for disaster than anything else.
DP Challenge
(light paintings)
Appealing Light - Hokie
http://www.dpchallenge.com/image.php?IMAGE_ID=301389
 |
| Appealing Light - Hokie |
John Setzler
(water droplet research)
Foliage
https://www.flickr.com/photos/jmsetzler/1450670069/in/set-72157602189655463
Remnants
https://www.flickr.com/photos/jmsetzler/2204593875/in/set-72157603604424731
Liquid Logic
https://www.flickr.com/photos/jmsetzler/1450725549/in/set-72157602189655463
 |
| Liquid Logic - John Setzler |
In our styling lecture we were told about using Glycerine to style water droplets onto products as using water will be more difficult because it runs down the product whereas Glycerine stays put as it is sticky, its available in most pharmacy's over the counter and I think that using it will create a great effect and add the sense of chilled to the object.
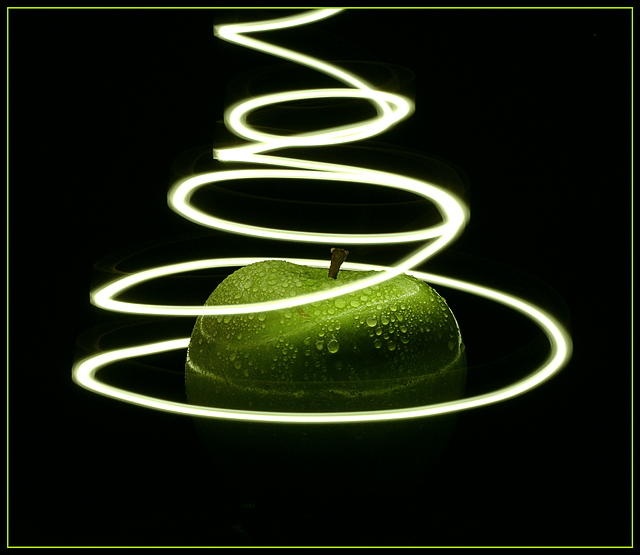
Salmin Malik
(light painting)
https://www.flickr.com/photos/sjmalik/sets/72157623571871690/
 |
| Apple got bitten by a Beetle - Salmin Malik |
This is another light drawing using fruit, I think that using props in the photograph helps add more to look and creates interest as people add their own stories to the props that are used. When I think of apples I think of school and "giving an apple to the teacher" so I may experiment with apples as well as strawberries.
Greig Houghton
(strawberry)
http://ghoughton.com/?p=22
 |
| Strawberry Splash - Greig Houghton |
Just Me Everyday
http://www.justeverydayme.com/strawberry-drop/
 |
| Strawberry Drop - Amelia |
This is another photograph of strawberry being dropped into a jam jar and this photograph could be used more in a commercial way to advertise strawberry jam. I want to try creating my own versions of this photograph.
Note:
I did not take any of these photographs, links have been provided to the original website that I found them on.
Thursday, 29 January 2015
Fruit Workshop
In this workshop we were given a brief that said to photograph the specified fruit or veg (my group were given apples) and any others we would like to do under both studio and natural lighting.
My group was in the area of the studio where the windows are so we set up our fruit by the windows to start the workshop. The windows had South light coming in through them, this had the problem that as it was late afternoon the light was not lasting and moved slowly so our set was constantly moving with it.
I also think we did not fully co-operate as a team, rather than working on making photographs collectively we started working as one photographer and three assistants. While another member of the team was working on her shots with one assistant I asked the fourth member to assist me with setting up another shot in a different area of the lighting; this seemed to cause tension in the group for some unknown reason however I continued shooting as I was not affecting the other members shoot and I wanted to experiment with my own ideas.
After the natural lighting had disappeared for the day we were unsure of what to do next as we could not shoot using window lighting any more, however as the studio groups were finishing a light became available for us to use, as my fruit set up was still laid out I asked if I could use the light first and the group members said yes; shooting with the studio light was much easier than with natural light as it wasn't moving away from my set: it stayed on the light stand and only moved when I moved it.
Personally I think the workshop was successful as I was introduced to shooting food, before this workshop I would not have been considering the "look" of the food and probably would not have thought about how it looks when purchasing it (this got us some funny looks when we were standing in the market stall closely inspecting all the fruits so we could purchase the "best looking")
I think it was also successful because I worked in a group setting reasonably comfortably whereas before I would have been too nervous to be able to shoot with a clear head and I would have been panicking about what the other people were thinking.
However I do not think all of my outcomes where successful (some have focusing errors and others I do not think the composition works as well as I thought during the shoot. I have included the props to create a school like feel of "giving an apple to the teacher" as this is what I imagined during the shopping trip to buy the fruit. I think the mushroom shot and the first apple shot are successful because they are in focus and they show the product clearly, I think the lighting in the mushroom shot works well because it high lights both the textures from underneath and on top and draws the eye in. The two final apple outcomes I do not feel as though they were as successful because the focus is slightly out and this is highlighted by the shallow DoF in the first image. The second image I think my idea was a little too far fetched and needs expanding, also if I was going to shoot this again I would change the lighting to overhead lighting to remove the shadow as I think it is distracting.
Outcomes :


Shooting Colour - Half faces
How I Did It
For these two different shoots I have photographed in the same style, I have taken three images of the person; a full face and then the two different halves of their face. I have done this because I am not sure how I will be able to print the two halves in the darkroom, I may be using a sheet of card with two squares cut out to allow the light to shine through on it or I may talk to the technician to get it printed on the digital enlarger so that I can create the layout digitally from scans of my negatives.
I set the camera up on the tripod and asked the model to sit down so they were comfortable to sit for a while, then I aimed the camera for half the face; I tried to include more than half the face so this would give me movable room in the darkroom if I needed to rearrange the framing. I also thought that putting them next to each other may look strange so I wanted them out of line with each other and having the middle of the face in the frames would give me this.
Shoot Two

Shoot Three

Still Life
We had our first lecture on still life, we were told about a change in copyright laws, I looked into it more after the lesson and found there was allowances for students being made (there was more changes but I looked into the eduction section as this applies to me)
"Researchers and students were previously allowed to copy limited extracts of literary, dramatic, musical and artistic works for non-commercial research and private study. They are now able to copy a limited amount of a sound recording, film or broadcast." Here (gov.uk)
I will also need to give acknowledgements to authors or artists, and state the name or description of the work.
Similarly I could also password protect my blog so that only my tutors have access, this would mean my blog is an educational and private research blog, however I do not want to do this because I want my work getting viewed, no point being a photographer if nobody knows I am one. From my understanding of the term my blog is a "non-commercial research or private study" blog (but I am going to need some more classification on this) so the first quote will apply to my work, which I think gives me allowance to use photographs in my blog.
We then did a task about what items we would need to set up our own studio, working in a small group we came up with a small list of things:
- Decent sized space (Dependant on the type of photography, windows/blinds, electricity)
- Studio Equipment (Lights, tripods, stands, light coverings, reflectors, diffusers)
- Backdrops
- Camera Equipment (Camera, tethering cable, light meter, wireless triggers)
- Electronics (computer/mac, kitchen area, stereo, model styling room)
- Insurance
- Networking (models, assistants, stylists, clients)
- Props (most can be found in charity shops or DIYed)
We also came up with a list for our "Bits and Bobs" section, which is a collection of items that could come in handy that don't directly relate to photography:
- scissors
- cotton buds
- tweezers
- bull clips
- hair clips / bobby pins / bobbles
- pegs
- white/blue tac
- paint brushes
- tape
I have also read while researching that a photographer should always carry aspirins and feminine care products just in case of emergency, not just for the photographer but available for all the people in the shoot.
Also in the lecture we were introduced to photographing the concept of a smell or taste as it these that make the product desirable. Tips for this is making the food look as though it has just been served, this could mean using smoke for hot food and water droplets for cold.
In the lecture it was also noted that moving food makes the food look more appetizing and that a darker photograph adds mystery to the food and makes it more appealing. It also doesn't hurt to "cheat" the food styling, for example using tape and blue tac to hold food in place, if the customers cant see it then it doesn't matter.
It also gave me some questions to think about when shooting commercial :
Who is my target audience?
Who is my client?
Whats the purpose of the photograph?
What would my budget be?
How would the final display look? (what size, where)
Is there going to be text included? Have I left room for this?
Shooting Colour - strangers
Pre planning
After my first shoot that I did I wanted the subject to fill more of the frame so that the details in their face were more clearly visible and you can easily see "who they are" (play on the title of the brief). I knew from using the Hasselblad camera before that there are extension tubes available from the store so that although the person does not feel as close as they are they still fill the frame and they do not look too uncomfortable being infront of the camera.
Because of the timing of this project the weather is a vital pre-check step, I checked to see if the weather would permit me too shoot on the day I wanted and luckily it did not rain that day however it was still cold so I did not want to be out shooting for very long (I lose feeling in my hands and feet very very quickly, and working the camera with numb fingers is not very quick) I was also worried that because of the cold the models would not want to stop and have to wait in the cold for longer than necessary.
Camera
I used the Hasselblad camera with a 150 lens (which is the closest the store has available) and either the 16x or the 32x extension tube. I also took a prism viewfinder so that I was not limited to people who are smaller than me as I was shooting from the hip and trying not to shoot from down below their face line on my last shoot. I managed to load the film with no problems (thankfully, as I was halving a roll with my friend). We set up the camera onto the tripod while we were sat in the reception area of the university, this was because we wanted to make sure we could just get out and shoot straight away and we were close enough to the photography dept. still if we struggled with something (but we didn't) another reason we did this is because both our hands lose feeling quickly and we weren't sure if we would manage once we were cold). Then we took the camera, decided who was shooting first and where we wanted to be and started shooting.
Shooting
Once the camera was set up the major problem started; I have zero confidence in asking people.
I knew before the shoot I was going to struggle with asking strangers if they wouldn't mind modelling but I had hoped once I threw myself outside infront of people I would be alright with the asking part, I wasn't.
If my friend asked the model then I was comfortable talking to them about the project and directing them where to stand and to look directly into the lens.
Shoot one
This is the contact sheet from this shoot, there is only six photographs as I shared the roll with my friend. I think these images are successful and the woman and the man underneath may become my finals because of the way the colours in the background pop and their faces are characteristic and detailed.
This is the contact sheet from this shoot, there is only six photographs as I shared the roll with my friend. I think these images are successful and the woman and the man underneath may become my finals because of the way the colours in the background pop and their faces are characteristic and detailed.

Wednesday, 28 January 2015
Colour Process - Research
Hints for the darkroom
Tip number one ... Turn around and go back to black and white, (no don't really, that is easier to print but the final outcome of colour prints is a very fulfilling feeling).
Tip number two ... Go in first with the lights on and get the layout of the room mapped out in your head, know where your machine is and how to get to both the printer and the exit easily (I counted out steps between the door and the back wall - 7 of my steps - and then I know where I am in relation to the room).
Tip number three ... Don't go in by yourself for the first few times, it can take a while to get used too and sharing a machine is an easy way to introduce yourself to the process.
Tip number four ... Talk to the other people in there so that you don't crash into them (yes that will happen).
Tip number five ... Always put all your paper away while not using it and when you leave the room, I do even when I'm in the room just incase (I'm not saying anybody would expose paper boxes on purpose - not at £45 a box I hope - but accidents can happen and it's always better to be safer rather than sorry).
Tip number six ... Test strips are easy to line up where you want them if you hold the strip underneath the shelf so it is out of the light and then run the timer; while it is running place your finger and thumb where the face is (or where you are testing for) then place the test strip against your hand when the light clicks off.
(This is a list of things all from me using the darkroom, there are probably some things I am missing in this list)
How To Use Filters
Once the test strip has been printed on 0 Cyan, 50 Magenta and 50 Yellow deciding an exposure is not the only step before printing a full print, any colour casts will need to be removed, finding these are used by looking at the test strip underneath a white light (as the photographs below are taken) and deciding by eye if he has a colour cast or if he just looks too warm/cool, once a colour has been found if it easy to get rid of it, on the door to the darkroom there is a colour chart which gives a handy hint as to what to change to remove the cast.
With the filter cards, hold up the filters infront of your eye so it covers the whole view of the test strip, then slide it along to see if the print looks a better or worse colour. This is quite difficult to use as first and I scrolled though most of the cards before finding ones that made it better but as I became more practised I would almost always know which cards would make it better, but not every time as my friend sometimes turned and told me to get my eyes checked.
Filters:
I took these images with the darkest filter changer so that the colour casts are more obvious but not every time the darkest change is needed, sometimes only minor changes need to be made and it can take a while to get a colour cast that you are happy with.
None


 Yellow

Magenta

Red


Green

Cyan

Blue

All at once
While I was taking these images the tutor came in and wondered what it would be like to look through all at once well here you go...

Tuesday, 27 January 2015
Possible Ideas - colour
Half Faces
I have been influenced by the book The Photography Reader by Liz Wells to take separate negatives of the two halves of peoples faces and show them together as one similar to this front cover.

Close Ups
I want to use the 150mm lens with the 32 extension tube so that peoples faces will fill the frame and show all the details in their face.
It is also worth noting the framing will be square because of the film so this will affect my compositioning as I am not used to shooting in this format.
What's it like using colour ?
Shooting
For this section of the project we are shooting colour 120 film with a Hasselblad camera, I am going to continue with working out in Church Square asking strangers as they go past (or trying to anyway). When I got my first negatives back from the store I was confused at first because I was not sure how they would manage to print all the colours as not all the colours are there on the negative and the unlike black and white where the tones get reversed the colour on the negative changes when it is printed.
Printing
Inside the darkroom is a lot different to the black and white darkroom I am used too, the first time I have been in the colour one is this week and I have struggled with navigating the room and having to line the paper up in the complete darkness, I am hoping that this will become easier as I become more accustomed to the room and how it works. I also struggled to come to terms with the filters to remove the different colour casts that can appear on the prints because of the negatives.
First Shoot
This image is a quick view of my first contact sheet from the first roll of film I have used, I think these images have worked technically very well as they have all been exposed correctly and they have all came out, however for the idea I had for the shoot I do not think they were successful because the subject is too small in the frame. For my next shoot I am going to use an extension tube as well as a prism viewfinder, this will mean the subjects will appear closer in my next shoot and the prism will mean I do not have to look for people my height (small) or smaller than me as I would not have too shoot from the hip and be looking up at people which can sometimes be quite an unflattering look.

Friday, 23 January 2015


.jpg)


Subscribe to:
Posts (Atom)